You must update XBRL dates to reflect the current reporting period when you roll an account forward. The XBRL Date Roll Forward feature streamlines this process. XBRL Date Roll Forward also provides the following features:
- Displays the number of date usages in the account
- Indicates when a date may require updating
- Provides a quick option to choose an alternative date
Using Milestones to Roll Forward a Document
Before rolling forward XBRL dates, you can first roll forward the document using Milestones in the Review panel. If you have questions about Milestones or want to use this method, please contact your CSM.
Accessing XBRL Date Roll Forward
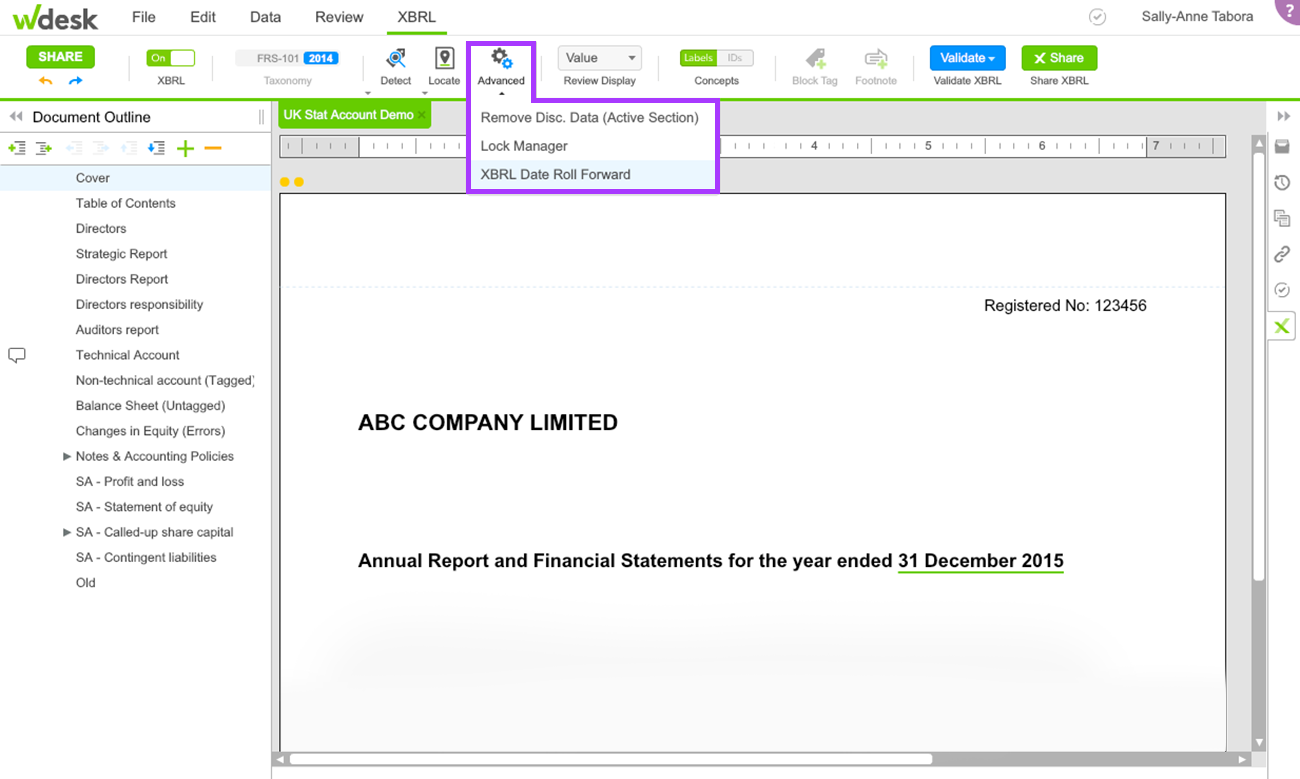
To access XBRL Date Roll Forward, open the document, click the XBRL tab, and turn on XBRL using the toggle. Click the Advanced icon and select XBRL Date Roll Forward.
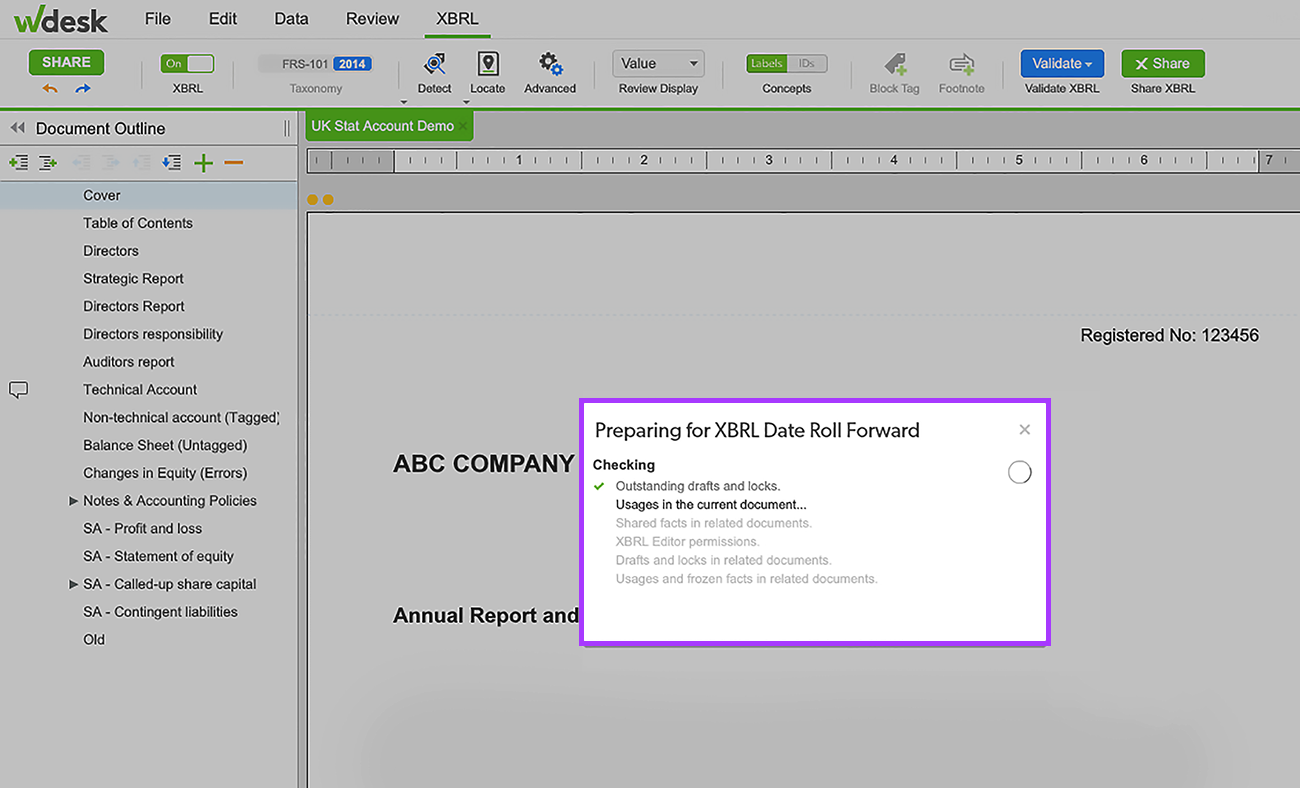
Wdesk prepares your document for roll forward by performing a number of pertinent checks:
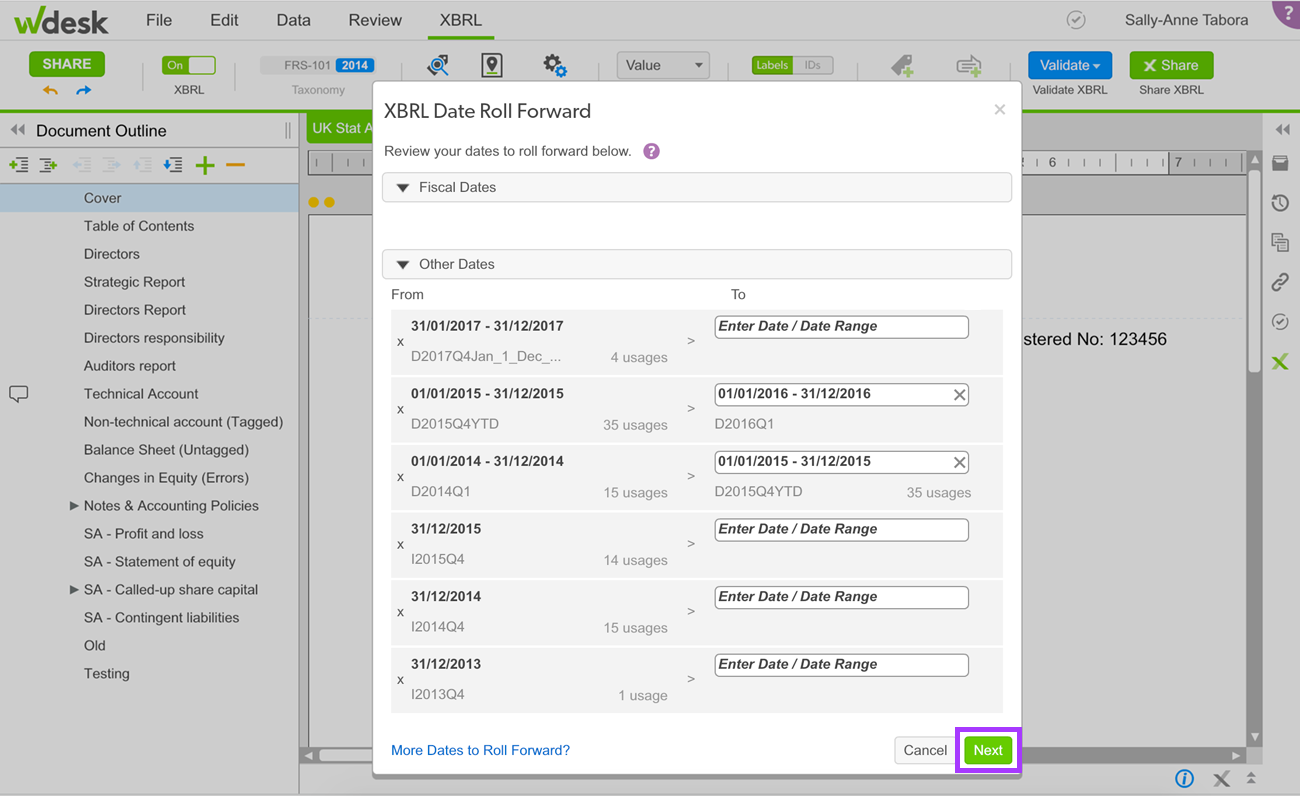
The XBRL Date Roll Forward dialogue box displays all XBRL dates that exist in the document as two types of dates:
- Fiscal Dates are generally not found in Stat accounts.
- Other Dates are the annual dates used in Stat accounts, both for duration and instant concepts.
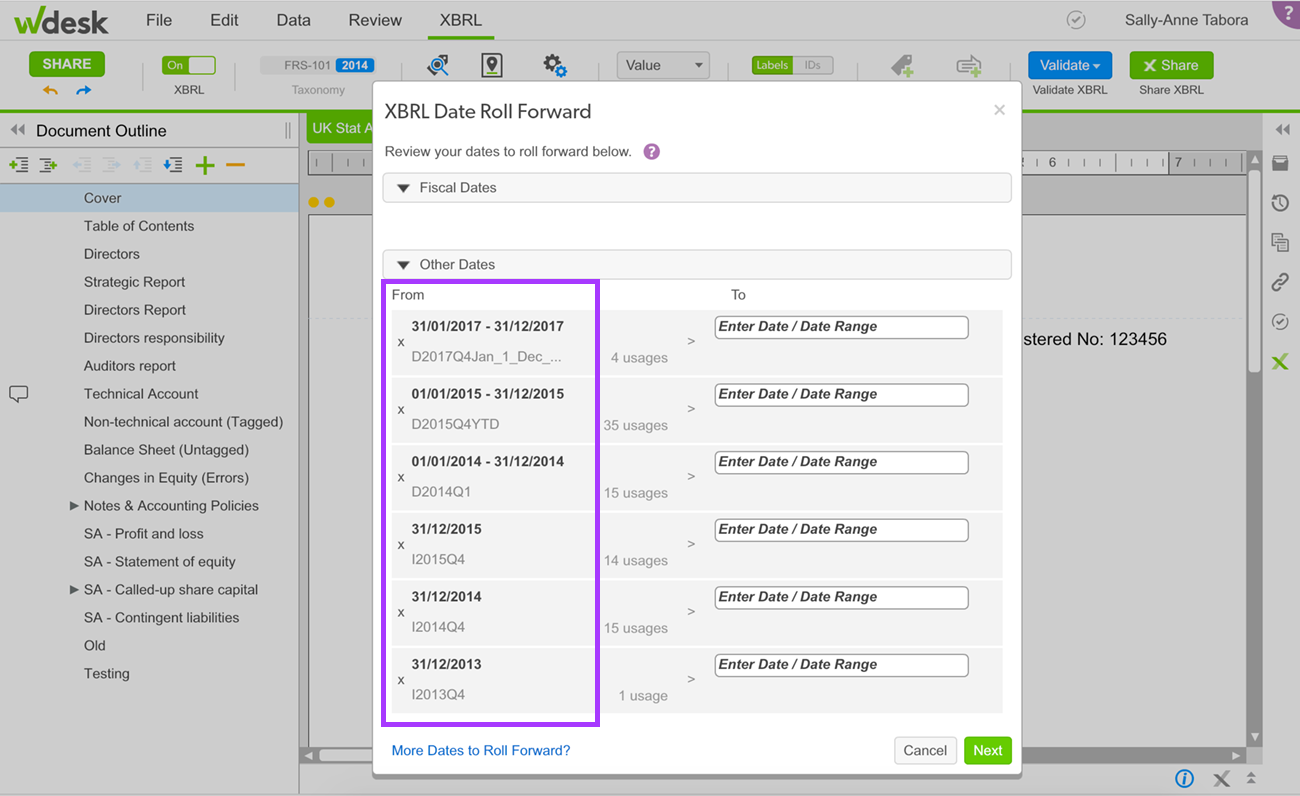
The number of usages are displayed next to each date. If no dates appear in the XBRL Date Roll Forward dialogue box, contact your CSM for further assistance.
Changing XBRL Dates
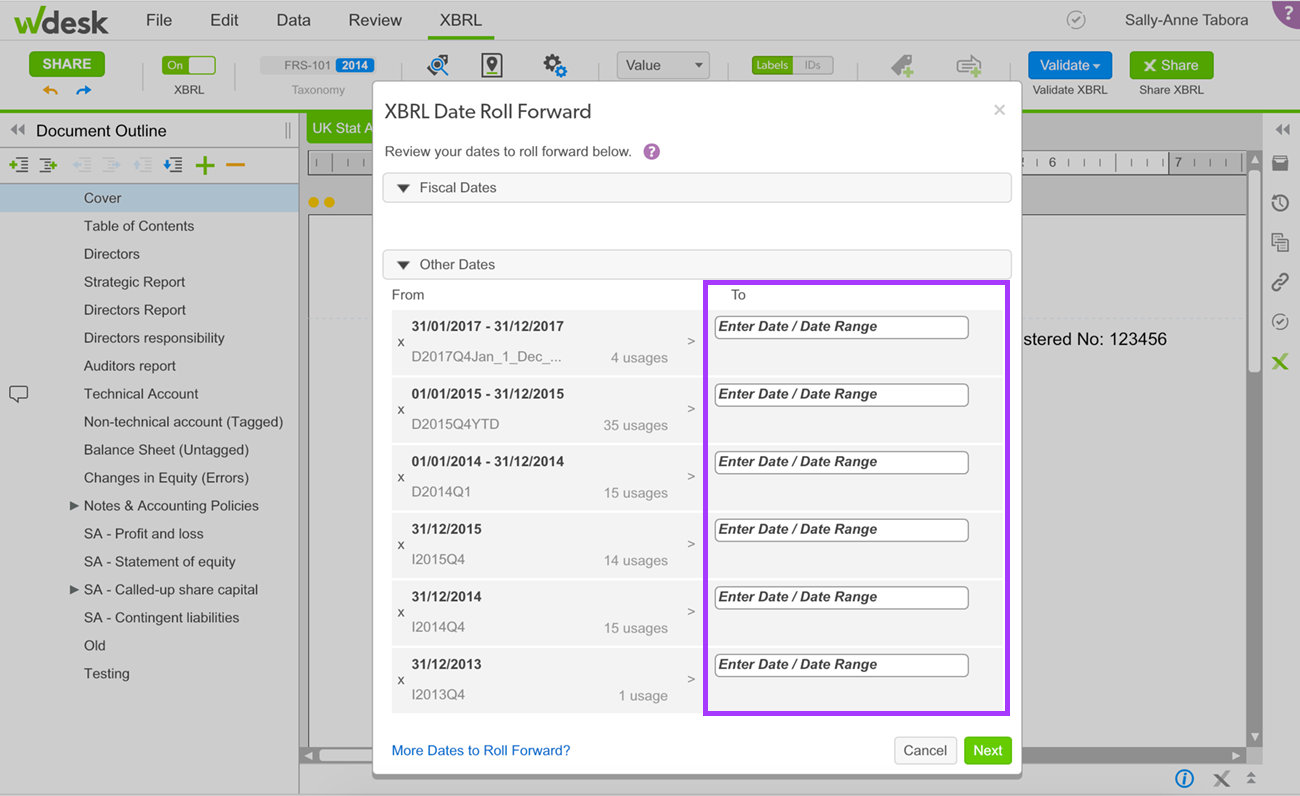
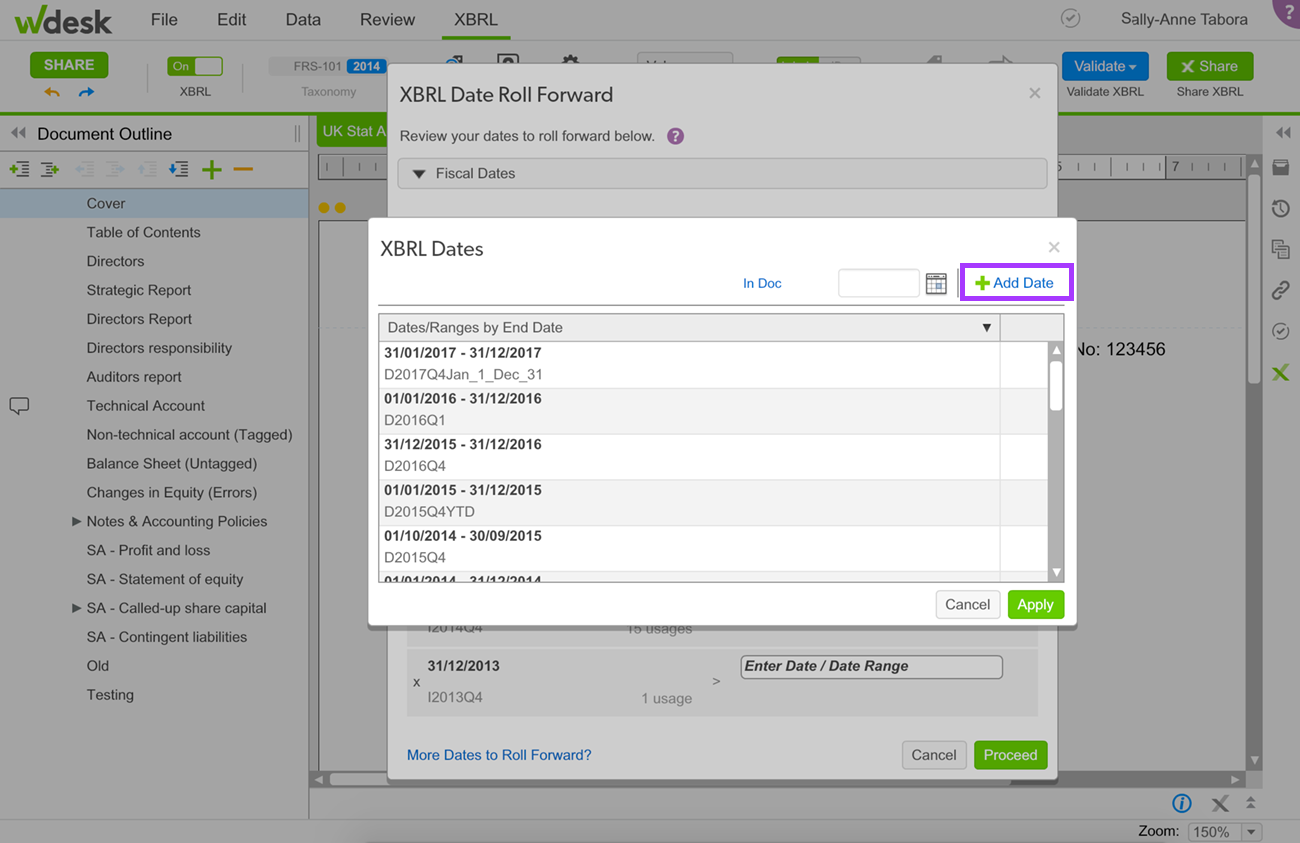
To open the XBRL Dates Selector, click the Enter Date / Date Range field next to the relevant date.
Select a date from the list, or click + Add Date (upper right corner of window).
If you choose a date that exists in the document, select the date and click Apply.
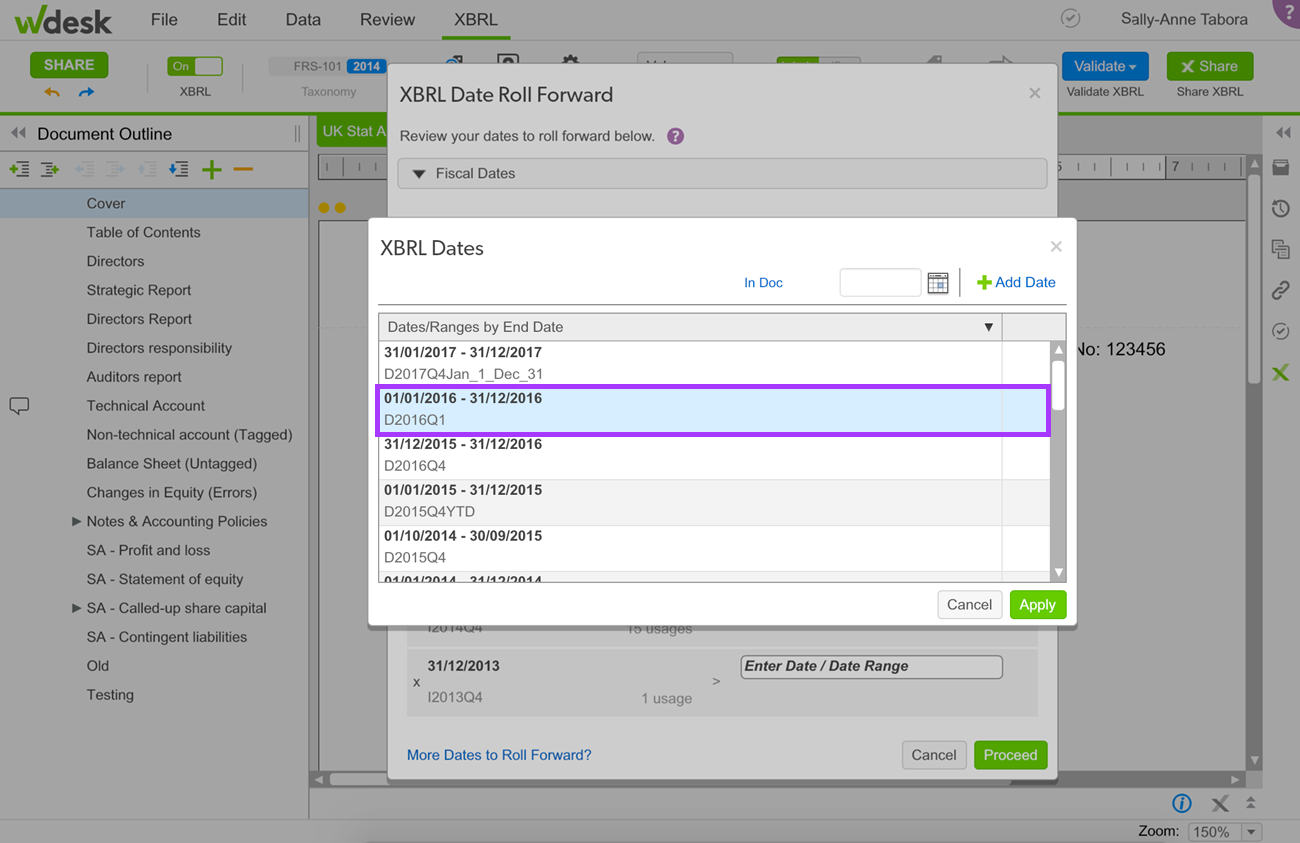
The date you select populates the Enter Date / Date Range field. When you are finished, click Next.
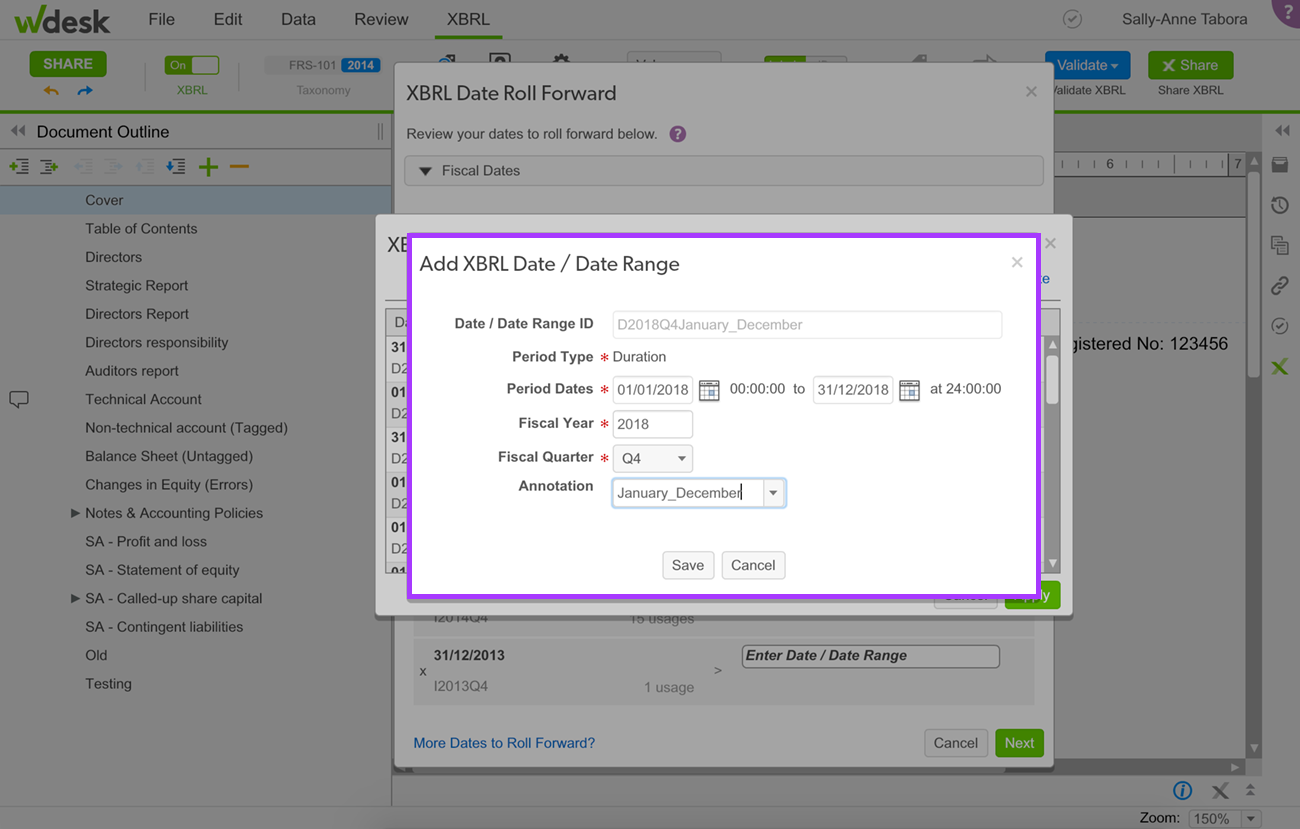
If you need to add a date that was not in the document for your roll forward process, click + Add Date.

The Add XBRL Date / Date Range dialogue box opens.
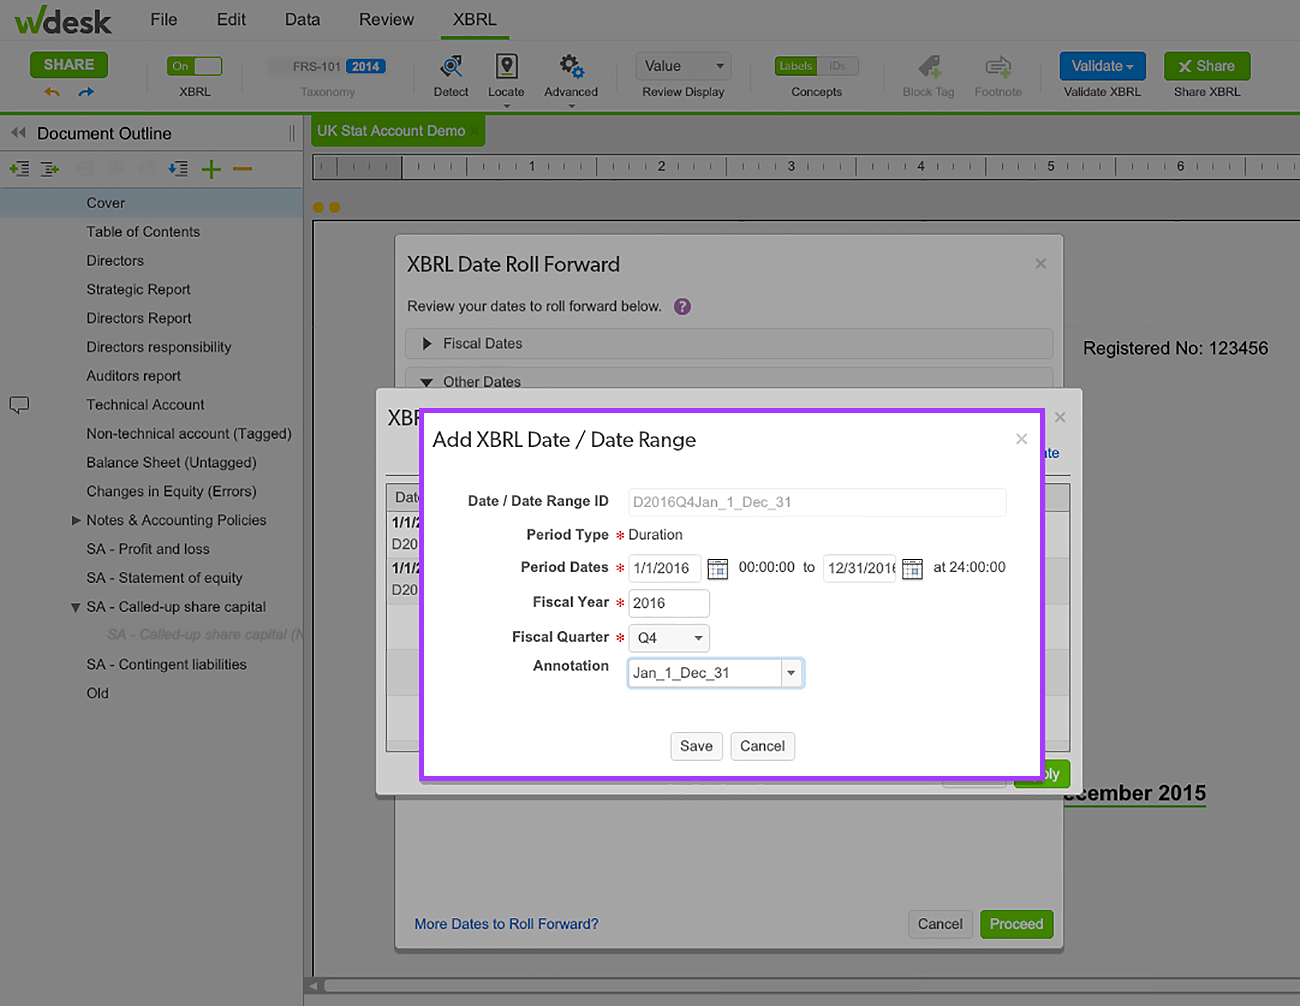
Complete the Period Dates, Fiscal Year, and Fiscal Quarter fields. You may add an Annotation to easily separate dates for viewing purposes. Click Save.
After you complete all dates that you are rolling forward, click Next.
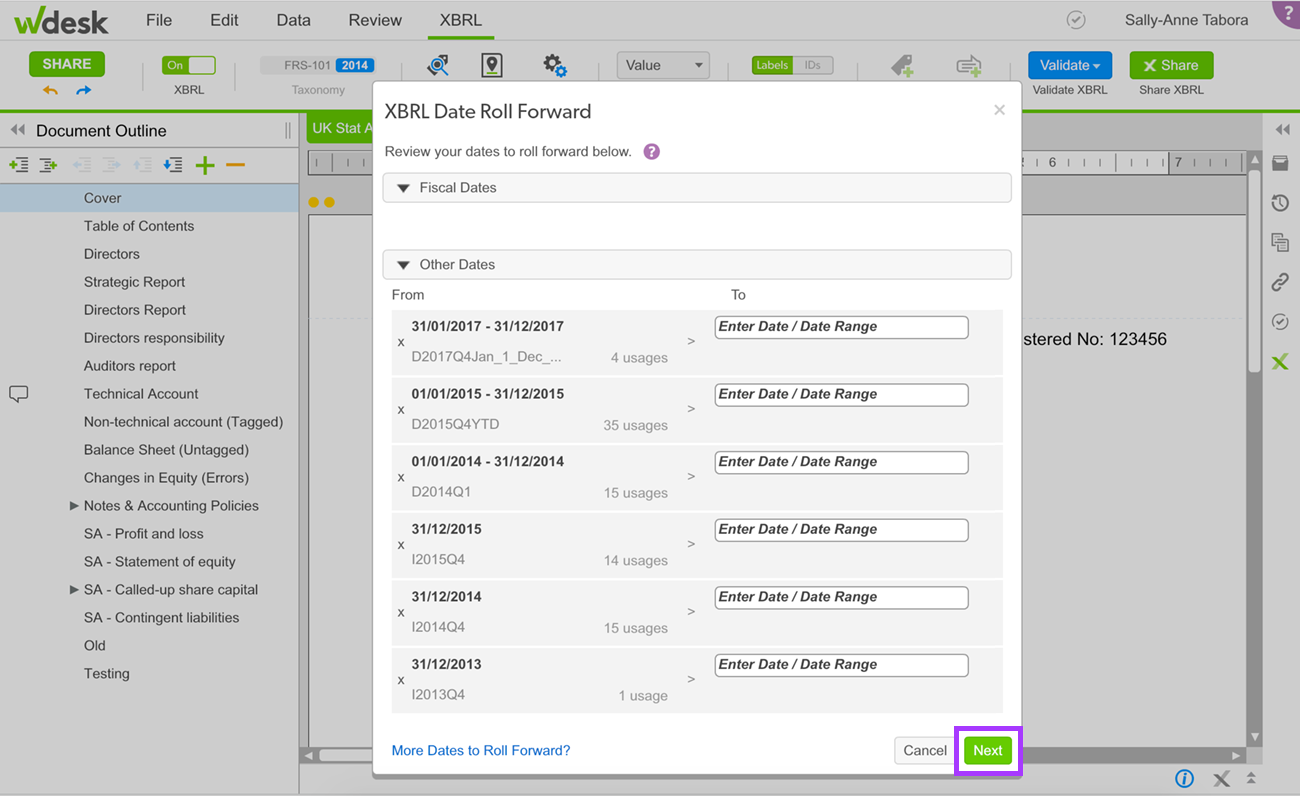
Additional series of dates that you may want to include in the roll forward appear.
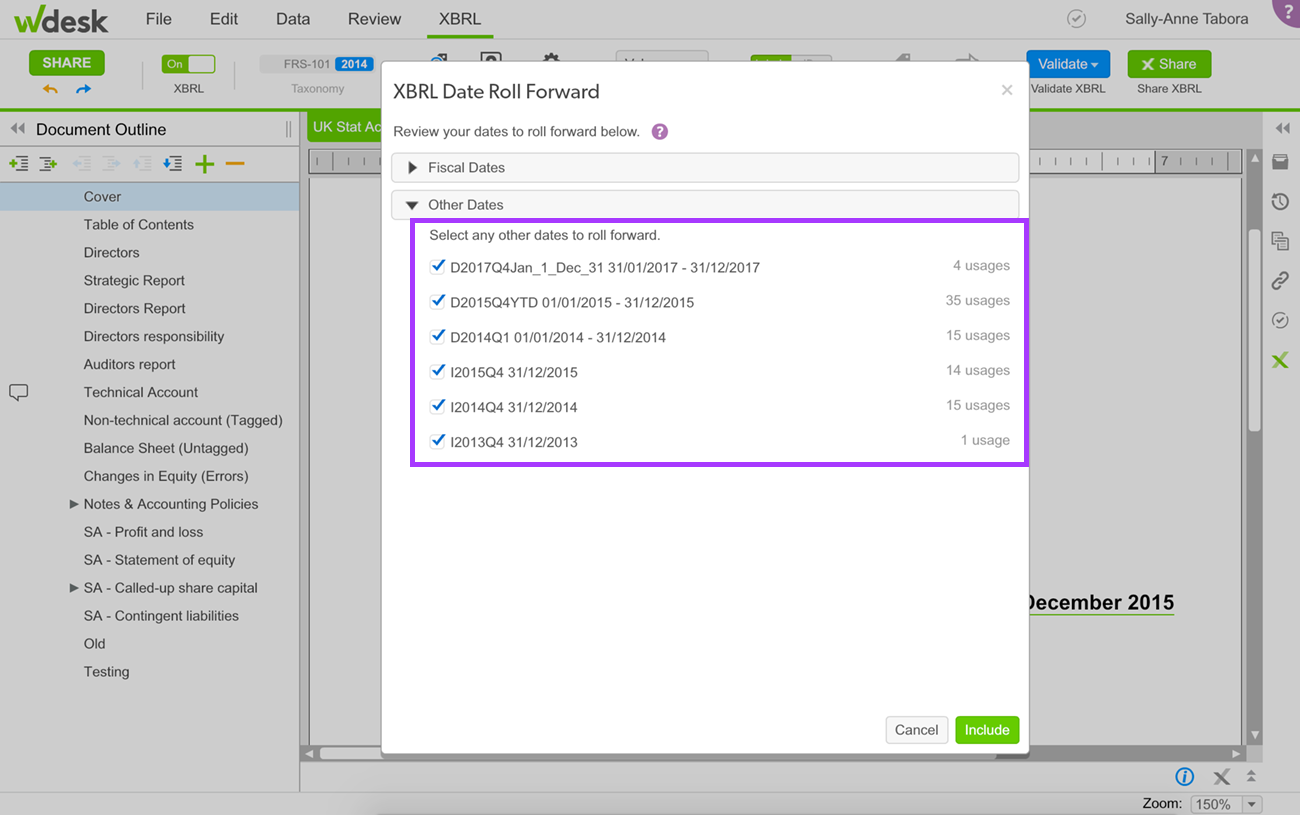
After you select all the dates you wish to roll forward, click Include.
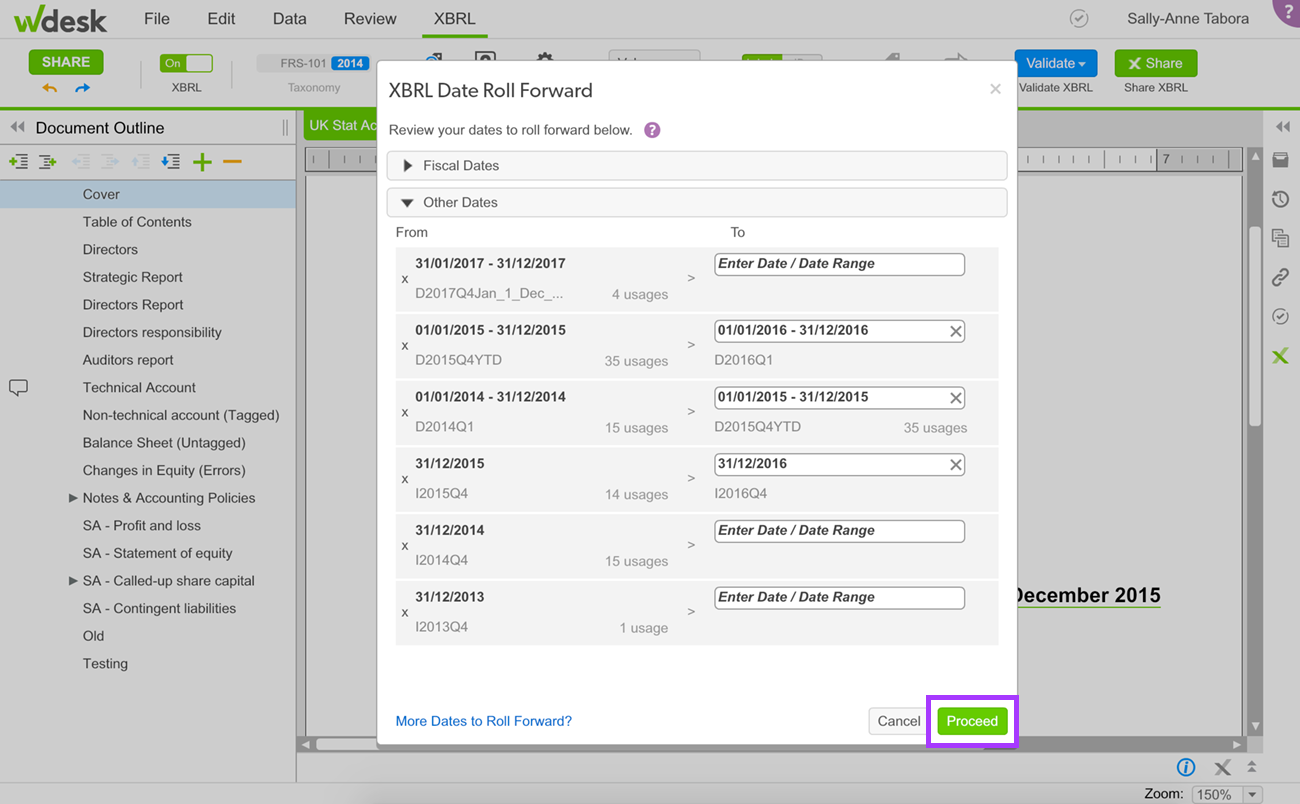
A notification may appear displaying potential date conflicts. Review the selected dates or merge the conflicting items.

Confirming New XBRL Dates
The Confirm XBRL Date Roll Forward dialogue box appears. Click Roll Forward to roll the selected dates.
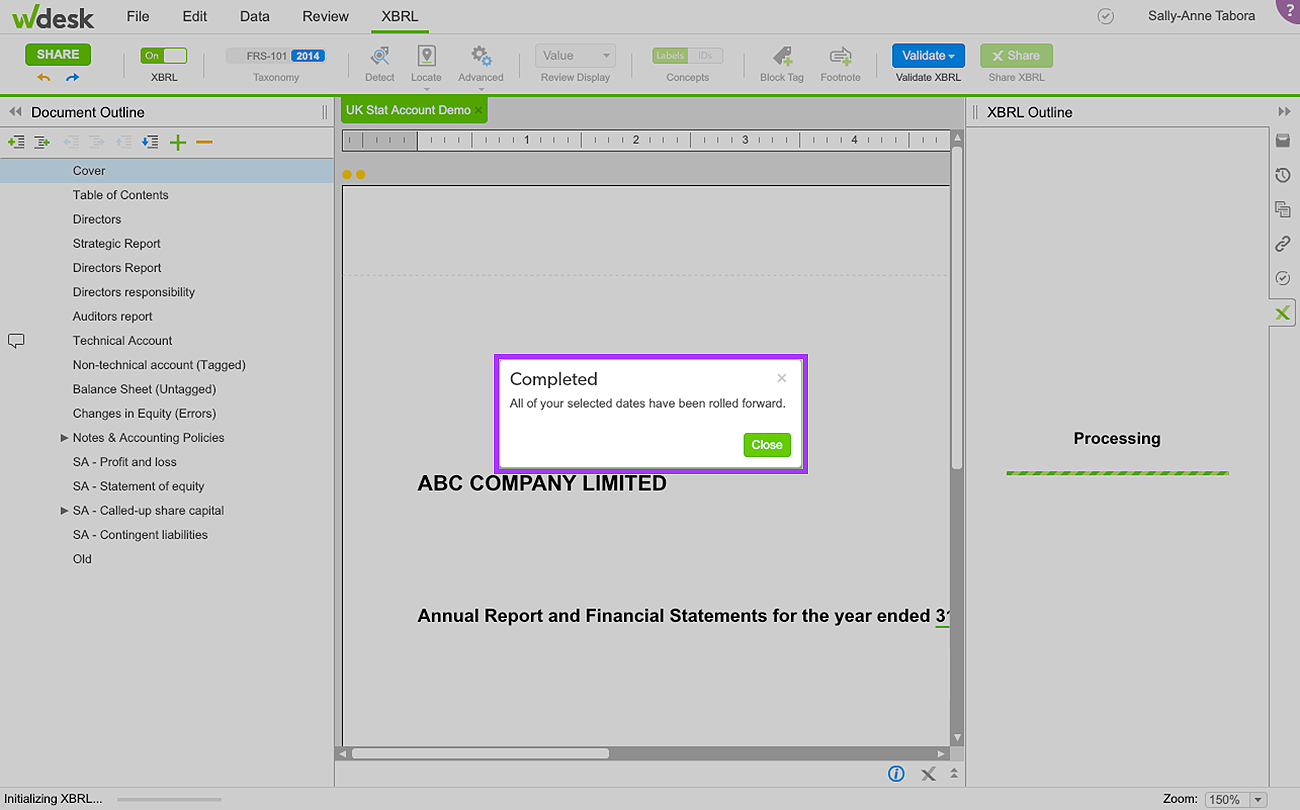
IMPORTANT: This action cannot be undone. Make sure you select the appropriate dates and click Roll Forward to proceed. A progress bar appears followed by a prompt that all selected dates have been rolled forward.
The Completed dialogue box appears when the dates are rolled forward. If your XBRL outline was closed, it opens because XBRL was temporarily turned off while the dates were rolling. XBRL turns on again after date rolling is completed.

If additional XBRL dates require roll forward, repeat this process at any time during the life of the document.